| # | Step | Action | Image |
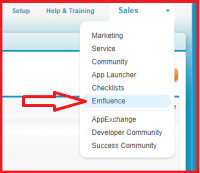
| 1 | Open emfluence Application | In the Salesforce App Menu, Navigate to the Emfluence app and select it |  |
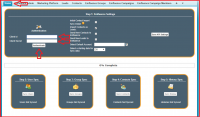
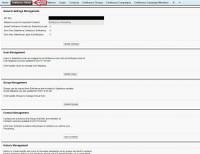
| 2 | Authentication | Select the “Emfluence Admin” tab from the tab menu across the top of the Salesforce page. Enter the Client ID and Client Secret and click “Authenticate” |  |
| 3 | Configure API Settings | Initial Contact Sync Detail - Select if you want existing information about Contacts in emfluence to sync during the setup process |  |
| 4 | Configure API Settings - continued | Import Contacts as Leads - select if you want records in emfluence to be added to Salesforce as Leads if there is not an email match on an existing Contact |  |
| 5 | Configure API Settings - continued | Send New Contacts to Emfluence - Select if you want new Contacts in Salesforce to be pushed to emfluence |  |
| 6 | Configure API Settings - continued | Send new Leads to emfluence - Select if you want new Leads in Salesforce to be sent to emfluence (emfluence stores all records as Contacts) |  |
| 7 | Configure API Settings - continued | Select or Create a default Account for imported Leads to be assigned to when no email match is made |  |
| 8 | Configure API Settings - continued | Select the number of days of history you want to set in the initial sync |  |
| 9 | Configure API Settings - continued | Click “Save API Settings” |  |
| 10 | Map Users | Click “Sync Users” |  |
| 11 | Map Users - continued | In the drop down list next to the Salesforce User's name, select the emfluence user you wish to map to and click the check mark button |  |
| 12 | Map Users - continued | Review your selections in the Mapped User table. You can remove a mapping by clicking the red “x” button |  |
| 13 | Map Users - continued | Save your selections by clicking “Save User Mapping” |  |
| 14 | Map Groups | Click “Sync Groups” |  |
| 15 | Map Groups - continued | Select the emfluence Groups to sync to Salesforce and click “Add Groups” |  |
| 16 | Sync Contacts | Click “Sync Contacts” |  |
| 17 | Sync History | Click “Sync History” |  |
| 18 | Finish | Click “Continue” |  |
| 19 | Finish | All of these settings can be updated by a System Administrator by navigating to the “Emfluence Admin” tab |  |